Finding and Filtering packets
To find and display packets of interest there are three main tools.
If you are unsure which filters are currently enabled, hover over the "Clear All Filters" button  to see a summary.
If you can't see packets you are expecting to receive, check whether they appear if you "Clear All Filters"!
to see a summary.
If you can't see packets you are expecting to receive, check whether they appear if you "Clear All Filters"!
Protocol and Profile filters
The simplest filtering tool consists of three sets of buttons. The buttons enable/disable the following types of packet:
Transports
 BR/EDR "Classic" traffic
 LE traffic
 WiFi packets
 802.15.4 packets, e.g. Zigbee
 HCI packets
 QBHSL traffic
 Channel-sounding tones and sync packets
... and various other proprietary transports.
Empty/degraded packets
 Unintelligible packets: CRC failures,
packets not dewhitened, incomplete L2CAP PDUs
Unintelligible packets: CRC failures,
packets not dewhitened, incomplete L2CAP PDUs
 Encrypted packets
 Unknown packets
Empty packets. These can all be enabled/disabled using the button, or separate types of Empty can be individually filtered using the dropdown.
![]()
Protocols & Profiles
Protocols/other categories of packet (LE advertising, FHS, etc). E.g.

The "All" and "None" buttons are shortcuts to enable/disable all toggle buttons in this row.

Descriptions of these icons, and all other icons and symbols used in the software, can be found in the "Glossary of Symbols" in the Help menu (shortcut F1).
Filter Devices

The second filtering tool allows LE and BR/EDR devices to be hidden or displayed. It is possible to create multiple device filters, which can be used independently in different tabs; so for instance you can create a "Broadcasters" filter to display in one Summary tab, and a "Phone and earbuds" filter to display in a second Summary tab.
Use the dropdown menu to select which filter you are editing, and the
New Filter, Rename Filter and Delete Filter buttons to modify the list
of filters. In each of the other relevant tabs (Summaries, Timeline,
Spectrum, Topology, Dashboard) there is a dropdown menu to select one of
the filters you have created, or to choose No Device Filtering. If you
want to use one filter throughout blueSPY, press the "Use this filter in
all tabs"  button in the Filter Device tab.
Any device filter you interact with (create or modify) during capture
will be stored in the capture file on Save; to make a device filter
available for future captures, press the
Pin button and it will be stored on your
computer until you "unpin" it.
button and it will be stored on your
computer until you "unpin" it.
The filter has two modes, selected using the "Devices" and "Connections" radio-buttons:

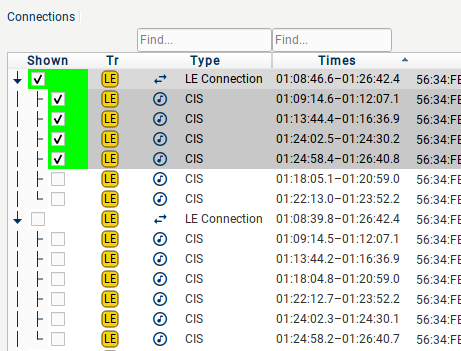
In Devices mode, the filter displays all packets involving a selected device, and all packets on any connection involving the device. In Connections mode, you can filter these packets further; the connections and audio streams involving the selected devices are shown in the lower pane of the tab, and you can choose which connections, and which streams (CIS, A2DP etc) on a connection to show.
When you use Connections mode, the Shown column of the Devices pane changes colour to highlight which connections involving a device are enabled in the filter; solid green for showing all connections, pale green for showing some connections, and clear for showing no connections involving that device.
In either pane, you can search for devices using any of the "Find..." boxes at the top of a column. Devices matching your search will be shown in bold, with a blue background in the relevant columns, and brought to the top of the pane. NB: If you enter text in more than one "Find..." box, the search only finds devices matching both search strings; so if you type in the Names/Vendors field and nothing appears, check that you haven't left a partial address in the Address box.

To find the devices you want to display, there are two tools to help:
-
You can sort the panes by any of the columns.
-
You can filter based on substring matching on either Address (ignoring colons), Nickname, or Names/Vendors (case-sensitive).
In the Devices pane of the filter, you can check "Automatically add devices matching search" to have devices added for you; e.g. if the device you are testing is frequently changing RPA (and no IRK has been seen), you can add its name or vendor to the search box and have all copies of the device added to the filter.
Any known IRKs are shown in the rightmost column of the tab (you may need to expand the tab or scroll right on lower resolution displays to see this column). If you know an IRK that has not been seen by the sniffer, you can add the IRK in this column. You can also set a nickname for any of the devices, and this nickname will then be used in place of/as well as the address in other parts of blueSPY.
Search interface
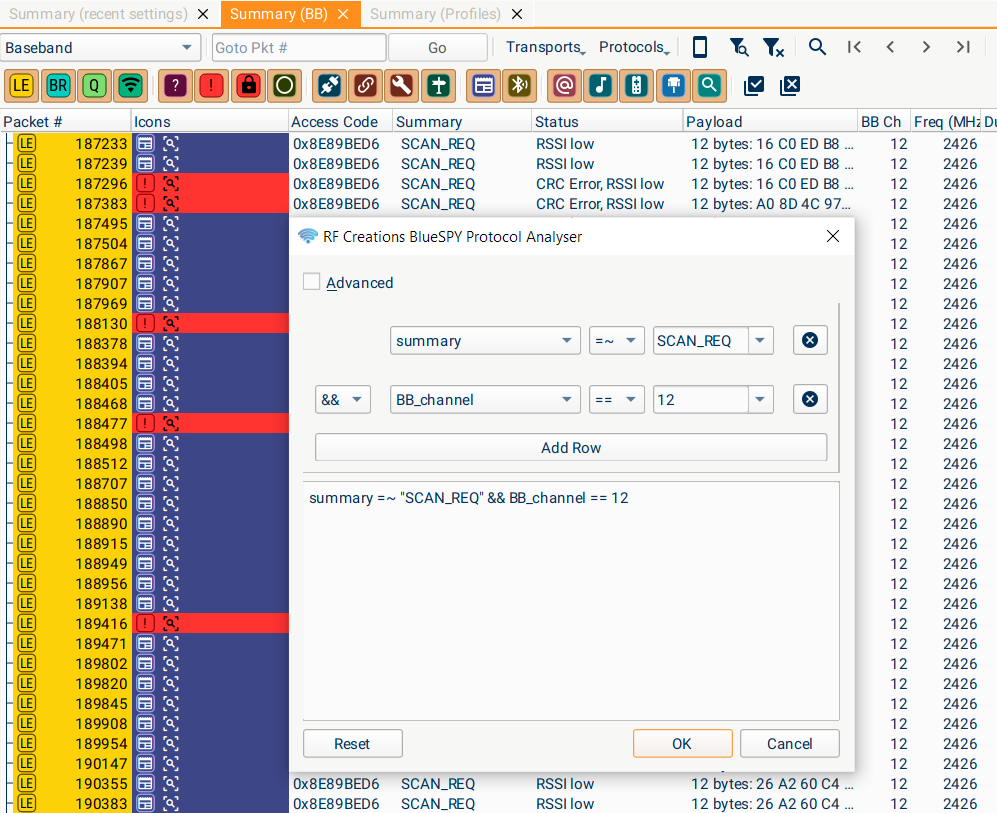
The final, more complex search tool is the Search and Filter interface. This allows you to search on a variety of queries associated with the packets. The available queries are listed here. It supports matching strings by regular expressions using the =~ operation. The supported regular expression syntax is documented here. It also supports == and != for exact comparison, < > <= >= for comparing numerical values, and && and || for combining expressions with logical AND or OR respectively.
For example, the search below finds all SCAN_REQs sent on channel 12. We use the =~ operation to find any summary containing the string SCAN_REQ.
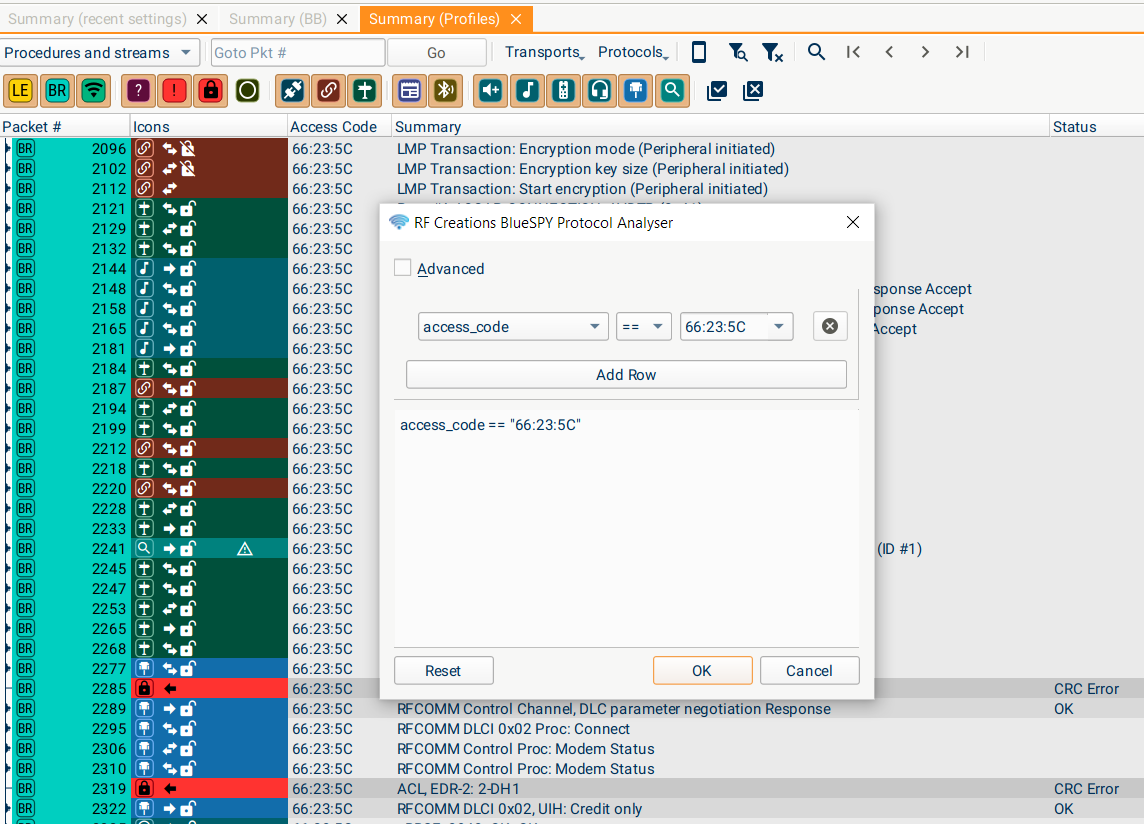
The following search illustrates filtering a particular LAP.
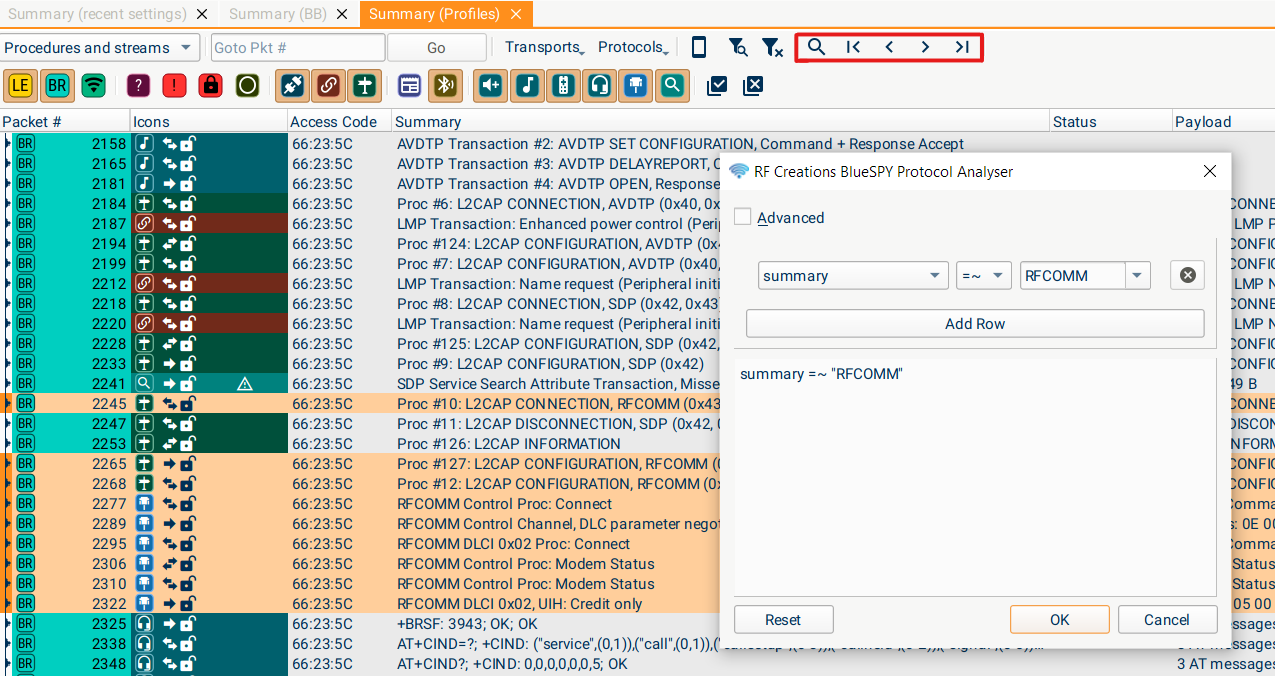
A similar interface can also be used to select packets matching a given search; the arrows to the right of the Search icon can then be used to step between the selected events.
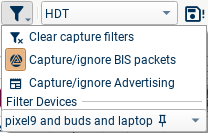
Ignoring packets
This is a more irreversible filtering option than any of the other options! This allows you to drop packets before they are added to the capture file; this can substantially reduce file sizes when capturing in a busy environment, but the packets are permanently lost and so this option should be used with care.
There are three components to this filtering, described below. A typical use-case for this option would be in a UPF or other busy environment:
-
Start capturing, with "Ignore packets" disabled.
-
Establish connections etc between the devices under test.
-
Use some combination of the options below to filter out un-needed packets before they are written to the file.
This will result in a capture file which is much smaller than would otherwise have been obtained.
Ignore Advertising
If this is enabled, all advertising packets will be dropped. This will prevent any new connections from being detected, so it's only safe to enable once you're confident the devices you're interested in are connected and won't need to reconnect.
Ignore BIS packets
This drops all BIS packets; BIS streams are by design easy to start and stop listening to, so it's safe to turn this on and off if you need to ignore or receive BIS data.
Ignore packets from devices not in the Device Filter
This drops all packets which we are confident were sent and received by devices not in the selected Device Filter. If a relevant device is using RPAs and changes address, then if blueSPY has been provided with the IRK the device will immediately be detected and its packets included/excluded. If you are using RPAs and the IRK has not been provided to blueSPY, then it's not a good idea to use the Device Filter aspect of ignoring packets, as packets are likely to be lost.